

Tuesday, May 7, 2013
Mother's Day Gift Wrap Ideas
Looking for the Perfect way to give mom her gift? Why not give it to her in a pillow box this year?? The best part...we have this as a die on our AccuCut Machine!!! be sure to stop in, bring in your scrap paper and CUT AWAY!!!
Monday, May 6, 2013
CREATE with Your Die-namics Die from My Favorite Things - Not Just for Paper!
Let's take a look at four types of materials easily cut with Die-namics,!!
A Note About Varying Pressure of Die-Cut Machines: The pressure produced by each machine will vary. Get to know your machine by trying different stack and shim options and keep your *recipes* nearby to make demo-ing a breeze for you.
Chipboard
You can create your own chipboard embellishments with Die-namics dies and thin cardboard, or lightweight chipboard. Chipboard embellishments add great dimension to cards and scrapbook pages.


Supplies- all from My Favorite Things....any of these can be ordered for you!!!
Die-namics: Behind the Camera; Mini Album Bracket STAX; Dainty Doily
Stamps: Behind the Camera
Fabric
Iron-on patches are the simplest way to add fabric to your projects. The patches have a backing that help fabric edges cut cleanly.

When using fabric scraps, make sure to add an iron-on adhesive to the back of the fabric. The backing will make the fabric easier to cut and will help prevent the fabric from fraying.

Use fabric in place of patterned paper on your cards or projects.

Supplies
Die-namics: Pretty Pocket; Rectangle STAX Set 2; Fishtail Flags STAX; Layered Rose; Simply Scallops Medium
Stamps: Howdy
Burlap and Felt
Burlap adds great charm to projects, as well as texture and dimension. When working with burlap we recommend an iron-on adhesive to help fabric edges cut cleanly.

Felt is a very popular material to use when cutting Die-namics. It is easy to work with and makes beautiful embellishments for your projects, such as flowers.


Supplies
Die-namics: Tradtional Tags STAX; Circle STAX Set 1; Circle STAX Set 2; Large Hybrid Heirloom Rose; Leaf-Filled Flourish
Stamps: Birthday Sentiments
We hope you're inspired to try new materials with your Die-namics Dies and all of your thin metal dies!! And remember "Die-namics are not *just* for paper!".
Let's take a look at four types of materials easily cut with Die-namics,!!
A Note About Varying Pressure of Die-Cut Machines: The pressure produced by each machine will vary. Get to know your machine by trying different stack and shim options and keep your *recipes* nearby to make demo-ing a breeze for you.
Chipboard
You can create your own chipboard embellishments with Die-namics dies and thin cardboard, or lightweight chipboard. Chipboard embellishments add great dimension to cards and scrapbook pages.
Supplies- all from My Favorite Things....any of these can be ordered for you!!!
Die-namics: Behind the Camera; Mini Album Bracket STAX; Dainty Doily
Stamps: Behind the Camera
Fabric
Iron-on patches are the simplest way to add fabric to your projects. The patches have a backing that help fabric edges cut cleanly.
When using fabric scraps, make sure to add an iron-on adhesive to the back of the fabric. The backing will make the fabric easier to cut and will help prevent the fabric from fraying.
Use fabric in place of patterned paper on your cards or projects.
Supplies
Die-namics: Pretty Pocket; Rectangle STAX Set 2; Fishtail Flags STAX; Layered Rose; Simply Scallops Medium
Stamps: Howdy
Burlap and Felt
Burlap adds great charm to projects, as well as texture and dimension. When working with burlap we recommend an iron-on adhesive to help fabric edges cut cleanly.
Felt is a very popular material to use when cutting Die-namics. It is easy to work with and makes beautiful embellishments for your projects, such as flowers.
Supplies
Die-namics: Tradtional Tags STAX; Circle STAX Set 1; Circle STAX Set 2; Large Hybrid Heirloom Rose; Leaf-Filled Flourish
Stamps: Birthday Sentiments
We hope you're inspired to try new materials with your Die-namics Dies and all of your thin metal dies!! And remember "Die-namics are not *just* for paper!".
Thursday, December 6, 2012
Our newest ON LINE Catalog!

http://www.flipcity.com/fvx/ulib/1f57b05b-9b24-4fbb-8631-8b2b09442f2f/10042/1/Web/mybook.html
I know how you LOVE these!! Here is the latest version of our on-line catalog! Just email us your orders and we will get them out to you ASAP!!
Have FUN...but just know, that this little guy can be DANGEROUS...in a good way!!! (and don't say I didn't warn you!)
ENJOY!
Hannah
YUMMY Cake from Bug Club!!
We had such a blast the other night at Bug Club! I am not sure if it was the great company, the really cool mini book by Teresa Collins that we worked on, or the wine cake; but it sure was fun!!
I know that we all wanted that recipe from Melanie...so here you go!
Ingredients
For Cake:
1 18.5oz. white cake mix
1 3oz. box blackberry fusion gelatin (black cherry can also be used)
1/2 c. oil
1/2 c. Blackberry wine (Mogen David is recomended)
4 large eggs
For Glaze:
1/2 c margarine or sweet butter- melted
1/2 c blackberry wine
2 c powdered sugar- sifted
To line bottom of bundt pan:
1/2 c chopped pecans
Directions: Preheat oven to 350 degrees. Grease a 12 c bundt pan and sprinkle bottom of pan with 1/2 c pecans. and set aside.
In a large bowl blend the cake mix, box of gelatin (dry), oil, 1/2 c wine and eggs at a low speed for 1 min. Increase speed to med/high and beat for 5 min until mixture is smooth. Pour batter into the bundt pan and bake for 45 min or until the top of the cake is brown and the sides come away from the pan.
While cake is baking, prepare glaze by combining the melted butter and the remaining 1/2 c wine. Gradually stir in the powdered sugar until the mixture is smooth.
Remove the baked cake from the oven. With a long fork cover the entire surface of the cake with deep holes. Pour the glaze over the hot cake. Let it cool in the pan for 1 hour and then invert the cake and serve.
I know that we all wanted that recipe from Melanie...so here you go!
Ingredients
For Cake:
1 18.5oz. white cake mix
1 3oz. box blackberry fusion gelatin (black cherry can also be used)
1/2 c. oil
1/2 c. Blackberry wine (Mogen David is recomended)
4 large eggs
For Glaze:
1/2 c margarine or sweet butter- melted
1/2 c blackberry wine
2 c powdered sugar- sifted
To line bottom of bundt pan:
1/2 c chopped pecans
Directions: Preheat oven to 350 degrees. Grease a 12 c bundt pan and sprinkle bottom of pan with 1/2 c pecans. and set aside.
In a large bowl blend the cake mix, box of gelatin (dry), oil, 1/2 c wine and eggs at a low speed for 1 min. Increase speed to med/high and beat for 5 min until mixture is smooth. Pour batter into the bundt pan and bake for 45 min or until the top of the cake is brown and the sides come away from the pan.
While cake is baking, prepare glaze by combining the melted butter and the remaining 1/2 c wine. Gradually stir in the powdered sugar until the mixture is smooth.
Remove the baked cake from the oven. With a long fork cover the entire surface of the cake with deep holes. Pour the glaze over the hot cake. Let it cool in the pan for 1 hour and then invert the cake and serve.
Thursday, October 4, 2012
Here are a few things SURE to inspire!
As must of you "hopefully" know....we are in the NEW STORE! It is SO AWESOME! (I am even typing this from my office!! WooHoo!) I cannot wait for you to stop in and check it out! Please keep in mind that we are not at 100% yet...there are still lots of little things we want to do, some rearranging that needs to be done, and we are still finding boxes that need to be unpacked, BUT we are open and know that you will still see a HUGE difference from our "old" store.
New Addy
671 3rd Ave ~ Suite C.
Jasper, IN 47546
(Same phone number 812-482-4949 and the same hours!)
Anyway, as I was going through about a weeks worth of emails...seriously... I found some REALLY cute ideas and techniques that I just had to pass on!
Enjoy!
Hannah
Here is a like to a SUPER COOL E-Zine that Lifestyle Crafts just put out....oh and stay tuned for some REALLY BIG NEWS about them! SO EXCITED!!!!
http://lifestylecrafts.com/magalog
Next up...the NEW Lolipop Die from My Favorite Things....We CANNOT keep them in! We keep ordering more, but they are spoken for before they even get here! Let us know if you want us to hold one for you so you get one before they are all spoken for...AGAIN!

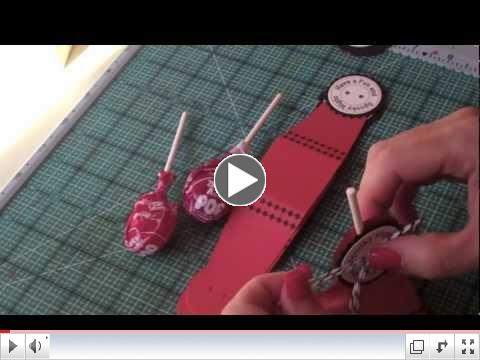

We can get you, just the stamp set, just the die set, or the combo set shown here!
FInally- we just HAD to share this rock'in card that our girl Tammy Tutterow did using those Ranger and Tim Holtz products that we all love! We DO have this new die coming, so if you just "have to" have it, let us know and we will hold on special for you!
Tim Holtz Tattered Poinsettia Card by Tammy Tutterow

Be sure to go to her blog to get step by step instructions so you can be inspired and recreate your own version! Thanks Tammy~another great project!! (She makes it look so easy!)
New Addy
671 3rd Ave ~ Suite C.
Jasper, IN 47546
(Same phone number 812-482-4949 and the same hours!)
Anyway, as I was going through about a weeks worth of emails...seriously... I found some REALLY cute ideas and techniques that I just had to pass on!
Enjoy!
Hannah
Here is a like to a SUPER COOL E-Zine that Lifestyle Crafts just put out....oh and stay tuned for some REALLY BIG NEWS about them! SO EXCITED!!!!
http://lifestylecrafts.com/magalog
Next up...the NEW Lolipop Die from My Favorite Things....We CANNOT keep them in! We keep ordering more, but they are spoken for before they even get here! Let us know if you want us to hold one for you so you get one before they are all spoken for...AGAIN!
We can get you, just the stamp set, just the die set, or the combo set shown here!
FInally- we just HAD to share this rock'in card that our girl Tammy Tutterow did using those Ranger and Tim Holtz products that we all love! We DO have this new die coming, so if you just "have to" have it, let us know and we will hold on special for you!
Tim Holtz Tattered Poinsettia Card by Tammy Tutterow
Be sure to go to her blog to get step by step instructions so you can be inspired and recreate your own version! Thanks Tammy~another great project!! (She makes it look so easy!)
Friday, August 17, 2012
Oh Sn@p!!!!
Here is a cute little video of one of the new lines that Melanie and I just fell in LOVE with while we were at CHA...and the good news is that is will be in NEXT WEEK!!! Now I've just gotta figure out where to put it all!!
Enjoy!
Friday, August 3, 2012
Keep'n UPS and FedEX in "Bidness!"
Well, we have been doing our part to keep UPS and FedEx financially stable! Pretty much everyday looks like this....


As you can see...lots of NEW and EXCITING STUFF is arriving everyday!
Here are a few things that have made thier way onto the shelf already!

More Copic How To Books...Say it with Style Books and NEW Embellishements Books!

This is a NEW line for us from Jillian Vance! LOVE the Stamps! Lots of Great Sentiments...and the DIES....Ohh lala!
My Favorite one has to be the ZIPPER DIE!
 |
| This allows you to create a "zipper" effect they you pull to open! What a FUN card this makes!! |
Next up...for our Card Makers...the is A BRICK'O CARDS!! Over 300...yes..3-0-0...PRE-SCORED Cards for...wait for it...$$12.25. If you do the math, that is 4 CENTS per card!!!! You're Welcome!! :)
 |
| Lots of colors in here! |
PUNCHES!!! We have added about 20 new punch styles too!

We got in lots of layering punches, like fancy squares, and snowflakes; as well as new ones to make the Punched Flowers, and silhouetted shapes! Melanie is using one of the new punches in the "Bee" Cards class next week and it is BEE-utiful! :)
AND FINALLY.......
Who DOESN'T LOVE a good sale!! WE DO! Check out these Goodies that we just got in...and put them on sale for you! Lots of great glitter buttons and felt accents! We have them at Sale Price and a Special Price for VIP Members!! These won't last long!

Be sure to stop in and check out everything else that has come in that I did not get a chance to list here!
Subscribe to:
Posts (Atom)