Welcome to The DoodleBLOG!

Hello and welcome to the DoodleBLOG. The official blog of The Doodlebug, Inc. Your scrapbook store, and more!

Friday, June 24, 2022

Photo Play Explosion Box How To...

Introducing the new Maker's Series Explosion Box kit from Photo Play! Available in black or white, this handy kit takes all the measuring and guesswork out of creating an explosion box so you can get on with the fun part of decorating and embellishing it! 

We just placed our order for them, so check out the great video that Amy Sonnemann has created and let us know if we can hold one or two for you!

The video is great and takes you step-by-step through the EASE assembly process. Now available at your favorite scrapbook retailer. Click on image below to watch!

Pre-order links: 

Black Explosion Box https://bit.ly/3xL4O20 

White Explosion Box https://bit.ly/3Nla9Dh 


Friday, June 17, 2022

Catherine Pooler Inks Color Combo Guide

 Ever have trouble picking the perfect ink colors for a card or project? Do you spend more time fretting over colors than actually creating?

If you answered yes...you might want to check out this color guide from Catherine Pooler Inks! They are our "Ink of Choice" here at The Doodlebug. We LOVE the color selection, we LOVE the foam pads, we LOVE how rich they stamp!


DOWN LOAD THE GUIDE HERE!


SHOP all the CP Colors we have in stock at the link below! 

***Don't see a color you want- PLEASE, just let us know and we will add it to our next order for you!

IN STOCK Catherine Pooler Inks


Wednesday, August 4, 2021

FREE Minibook Download from Photoplay

  Hi friends!

I hope you are having a GREAT WEEK! I'm super excited to share this adorable, FREE project with you all!  Our friends over at Photoplay have shared the complete set of instructions to this precious mini album featuring their cute little frogs Fern and Willard! 


If you haven't snagged up this line...get it HERE in our online store!

AND...HERE is the link to the Blank Album!


But, how cute is this little album!  I love the bright colors and patterns and the general feeling of happiness that I am getting from this project!  

To get the full set of free instructions, follow this link right here!

I can't wait to see these cute minis that you all make! 

ENJOY!

Hannah


Thursday, January 21, 2021

EXCLUSIVE Ginger Ropp Virtual Class


 We have worked with top 5 YouTube blogger Ginger Ropp from My Sisters Scrapper to create an EXCLUSIVE gatefold folio album using Echo Park’s I Love Spring collection that you can only purchase from a handful of independent papercraft stores! We are so excited and pleased to tell you that the project can be viewed on Ginger’s YouTube channel, My Sisters Scrapper. Look for the Echo Park I Love Spring Gatefold Folio video. The class will be held ONLINE, so anyone, anywhere can participate with us!

You may now order your kit (first come, first serve…kits are limited!) from us, so order TODAY so you do not miss out!

The class will be held ONLINE on March 10th at 8 PM! Can’t tune in at that specific time? That is totally fine! You will be given an access code that you can use to watch the video anytime you choose! Kits will be available for pick-up in early February and can also be shipped if you are not local to our store. Plus, we are treating this like it was an in-store class, so you get 10% off your purchase when you pick up your kit (or have it shipped)! So, we hope you will join us for this fun project. Kits can be ordered in-store, online, or over the phone at 812-482-4949. Don’t delay and miss out!

*Shipping is extra. We only charge actual shipping costs and ship via USPS Priority.

Monday, November 2, 2020

Travel Cropping ....or.......how I go to a crop or retreat


Scrapping “TO GO”


Hey there DoodleBLOG friends! (all you cats and kittens).  Shawn here (yes, again).  As promised, I want to talk a little bit about scrapping away from home.

·         For some of you, this may be the only place and time you get to scrap, and you may be old pros.  Maybe you will find something good here anyway – or maybe not. 

·         Some of you may have NEVER been to a crop or a retreat. Maybe you just never have the time or the extra cash, maybe they don’t work with your schedule or maybe the thought of packing your scrapbook room to take somewhere is just too daunting.  Maybe I can help!

·         Or if you already sometimes scrap at home and go to crops or retreats maybe you will find something here, too.

So here we go…..

1.      KNOW WHERE YOU ARE HEADED – What you pack – and how you pack it – will need to be defined as much by this as by anything else. Is it a small day crop where you will share an 8 foot table, or a retreat where you have a big table to yourself?


2.       KNOW HOW YOU ARE GETTING THERE - Are you driving there in a big SUV, a tiny convertible, or are you flying to the event?


3.       KNOW YOUR SCRAPPY SELF.  Think about your process.  What is your starting point for a project?  Do you start with photos and then pick all your supplies before you sit down to scrap?  Do you just make pages and worry about photos later, if ever?  Do you like to make pages using a single collection?  Do you scrap by color?

4.       KNOW YOUR “STASH”. Don’t get overwhelmed here.  Just get an overall idea of how much you have and how you have it stored.  Do you only keep a small stash and it’s already in a single tote (if so – who are you and how and why do you do this?? – also, if this is you CALL ME – you don’t need me, but maybe I need you!!) Do you have a GIANT ROOM full of supplies – like maybe a whole dining room – that just has stuff EVERYWHERE (see photos)…or are you somewhere in between – like a big stash but still pretty easily managed to move?

5.       MAKE A LIST. OK, I get it.  Not everyone loves lists (I do – like A LOT) but bear with me here.  This list will be worth it.  My OG crop packing list is now SEVERAL years old, and it is still evolving, but it changes a bit with every crop. This is both because I learn more about what works for me, but also because I go to lots of different events, and I work on loads of different projects. I divide my list by how I carry them so I know what goes in each tote/bag and also so I make sure I get all of the bags into the car. Make sure to include the non-scrappy necessities like clothes, meds, snacks (and for me maybe a little liquid refreshment)


6.       PRIORITIZE – I tend to be a “photos first” kind of scrapper, and I use black, white or kraft cardstock on just about every layout so pictures and cardstock are almost always the first things that go into my car. If you always use a Cricut or Kiwi Lane Templates or you stamp everything then those items will go first.

7.       KIT, if you can.  I’m going to be 100% honest – this is a great plan, and totally NOT something I do well.  It just does not work that well with my process most of the time. I do currently have an Iris container full of different papers that I plan to use in my wedding album, and a bag of embellishments set aside for that as well.  I suppose that may be a really large kit, but I’m not sure it counts. If you can kit, that is a great way to get ready to get ready. The more of your project you can put together in a kit, the easier it will be to sit down and scrap. 

8.       Remember the less important things, too.  If you will be gone for the weekend you probably need to take clothes. If it is a day crop, a sweater or chair cushion may be in order.

9.       Be prepared to be wrong.  I have gone to several crops with a plan like making Christmas cards or working on a specific group of photos only to find when I get there that I am not inspired enough to get that project done. Be sure to have a backup if you need it.


10.   Pack it up - and hope it all fits!!!

11.   Take extra if there’s room.  In addition to #9 above you may find that you REALLY want some letter stickers you didn’t think to put in your kit, or your table mate may want to borrow that 3 inch circle punch.

12.   The last bit of advice I would give is remember that just because you take it TO the crop does not mean you have to take it IN the building.  This is one I figured out pretty recently.  Take projects in as you want to work on them, and when you finish with one, go swap it for another. I have also been known to bring my pretty large Thicker collection and leave that in the back of my car, then I just go grab letters as I need them.

That’s it – Happy Travelling

And more important Happy Scrapping!


Monday, October 26, 2020

Greeting Cards

 Hi Scrappy Friends,

I wanted to talk you this month about something that means a lot to me and I have become passionate about. It's sending out "handmade greeting cards". The best definition of greeting card I could find is this: A greeting card is an illustrated message that expresses either seriously or humorously, affection, goodwill, gratitude, sympathy or other sentiment.

Who doesn't love to open the mailbox and find a handmade greeting card? Doesn't it just make your day? Someone thought especially of you. They took the time to create something special, address it and send it your way. Once you have it, it becomes a treasure, are you like me, do you save them? I have boxes of special cards that I have received. Cards with my grandmother's signature or the scribbles that used to be my son's signature's are priceless. 

We live in a world of mega technology that is rapidly replacing our card making. I am super guilty of checking my Facebook page everyday just to see who's birthday it is. In two seconds, I can wish them a happy birthday and great day. We can shoot an email or text greeting in an instant. While it is always heart felt, its not a keepsake or treasure. I know we are all busy, our lives get consumed and days just run into weeks. But, we are scrap bookers, card makers, artists and creators, we can do better.

This year of 2020 has been very challenging. I don't no anyone it hasn't effected in one way or another. For some it has been illness, loss of love ones, loss of jobs, depression and isolation. There is NO better time to get back to the practice of sending our handmade greeting cards. I bet you can think of three people right this second that could use a pick me up. How about Thanksgiving, who are you grateful for? Take the time to let them know just how much. And Christmas is a wonderful time to send a greeting and a wish for a much better - happier -healthier New Year. 

If I were to describe the Doodle Bug store to someone, the first thing I would say is, it's a scrapbook store, but in reality approximately half of it could be described as a card making store. Stamps, ink, die cuts, embellishments, kits, cards, envelopes its all right there waiting for you. 

There are 3,648 people that "like" the Doodle Bug on Facebook. What if everyone of them sent one just one handmade card to someone. That is 3,648 smiles. We need that. I'm challenging you to dig out your old address book and send out a card. Post it on the Doodle Dish, that will help encourage someone else to do it too. If you need a card yourself or know someone that needs more than the one card you can send, please give Hannah your address she will give it to me, I would love to send one to you or someone in need of one. My goal is to send as many cards as I can in 2021.

I am attaching some of my personal favorite card making supplies below. 

Remember, "Alone we can do so little; together we can do so much!" (Helen Keller)

https://www.thedoodlebuginc.com/shop/SHOP-BY-VENDOR-or-DESIGNER.htm?search_keyword=slim+line

https://www.thedoodlebuginc.com/shop/SHOP-BY-VENDOR-or-DESIGNER.htm?search_keyword=gina+k

https://www.thedoodlebuginc.com/shop/SHOP-BY-VENDOR-or-DESIGNER.htm?search_keyword=fawn+lawn

https://www.thedoodlebuginc.com/shop/SHOP-BY-VENDOR-or-DESIGNER/Tim-Holtz.htm?search_keyword=stamps

Monday, October 12, 2020

Create fun slimline cards step by step with Abby


 Today I will be sharing with you my love of creating with multiple companies to create a look I love.  

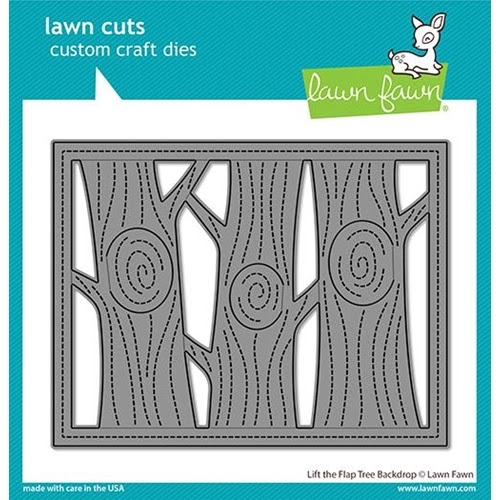
New Penny Black and Lawn Fawn recently hit the shelves at the Doodlebug, Inc.  I instantly fell in love with the Halloween gate die and the "sugared" stamp set from Penny Black.  Also ideas of all the cuteness I could fit into the flaps of the "lift the flap tree backdrop" from Lawn Fawn. 

 To start out I cut bases using the nested slim layers die set from waffle flower. 


Then I inked the background with Catherine Pooler inks in tiki torch and sand castle using the life changing brushes.  


.


I cut grassy hills using "Abbie Road" kiwi lane template and inked the edges. 


Die cut out the trees and cut apart.  Die cut out the Halloween gates.  I set out my piles to start the assembly line.  I will make one card from start to finish, then cut out multiples to assemble together.


I stamped out the images onto Gina k designs heavy base weight white using memento tuxedo black ink.  I colored them with alcohol markers.  I want to try colored pencil and gamsol next as I recently picked up some gamsol at the Doodlebug.  


I lay everything out to see the spacing before adhering in place.  


I popped up the critters using foam tape.  


I adhere it to a slimline card base from the paper cut.  I let the products do the work for me and having card bases on hand does just that. 

I stamped the greeting on the front of the card and inside the flaps


I stamp the inside of the card too.  Finishing the inside gives a completed look even with just simple stamping or going all out with a matted inside.   


 I made one with a glittered gate and changed one up with both trees on the right.  I like that all the hills are different using the kiwi lane template, gives variety and makes each one unique.


Do you like to create with multiple companies at once or just stick to one company per project?  Let me know in the comments below.

Abby