Welcome to The DoodleBLOG!

Hello and welcome to the DoodleBLOG. The official blog of The Doodlebug, Inc. Your scrapbook store, and more!

Friday, November 29, 2019

Add a little sparkle


Hello Doodlebugs! 
As we are all gearing up for the holidays and our holiday projects what better topic than sparkle. I love to add color, sparkle and splatter affect to most of my projects. It all started with Ranger Distress Oxide Sprays.  These give great opaque coverage and Ranger has a WIDE range of colors to choose from.


Once you've got your base color down....now you can play and REALLY add that sparkle and shine.  Here are a few of my favorite products to do just that!

Tonic Mousse can be mixed with water (alcohol does not work) in a spray bottle and you can create a light shimmering mist to add to projects. These can also be layered, but are the lightest in color. Tonic came out with their own line of color sprays. The first one is the Mica Mist; this spray uses mica power. Mica is a natural stone mineral with shiny flakes, these flakes are ground into a fine powder and used for this spray. The color is more solid and can be used with stencils, in backgrounds and also by painting on your project. The Tonic Sparkle spray is the best for sparkle, dense color and coverage. This spray uses ultrafine glitter. If you are looking for ultimate sparkle on a project this is your product!


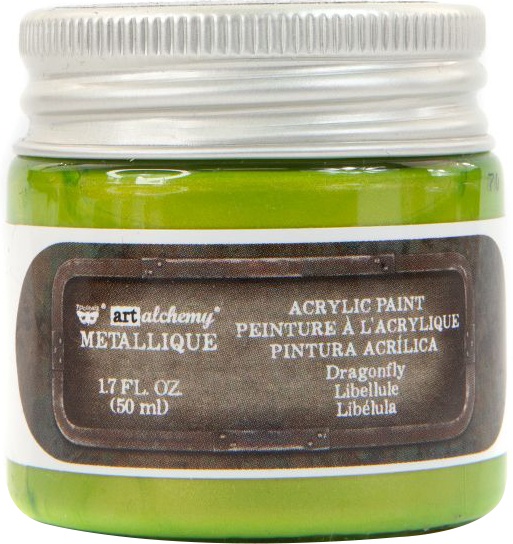
For a “splatter” effect on projects the best to use are Prima Art Alchemy paints. These paints come in metallic and sparks (glitter) tones. You will need a paint brush, dip first in water, dip second in paint (don’t be shy) and dip again in water. Next start tapping the paint brush around your project to give the splatter effect.  

                                                               Prima Alchemy paint
An example of using many of these products is on the store sample mixed media project with the fairy garden. This started with 3D gel and a brick stencil, once dried I coated the canvas in white gesso.  Next I used multiple sprays to create just the right color for my aged brick garden background. Just remember if you don’t like something you can always gesso over it and start over.


Thanks for checking out my blog and I hope this inspires you to try a new technique or product!!
Amberly

Wednesday, November 20, 2019

Shawn's First Post

Hi DoodleBLOG readers – Shawn here with my FIRST POST as part of the Doodlebug Design team.

OK…..real talk….TRIGGER WARNING – **Mom stress and moments of weakness**

Sometimes life doesn’t go my way. Yesterday I was certainly having one of those days. I’m super angry with my 19 year old college student. She was supposed to clean her room before the start of the school year.  I found out last week she didn’t and let me tell you it was a disgusting PIT of EPIC proportions. So, she is home this weekend and I’m making her clean it. Not me – her.  last night my other kid lost one of his favorite possessions (Nintendo Switch) and I got REALLY annoyed helping him look for it for well over an hour. Add to that I have the following things on my plate:

Some copy I need to write this week at work that I’m trying to come up with ideas for.
I need to get some pages to the store for display
I’m still not done with my friends baby album (kid was born in Feb)
I haven’t even started the calendars I make as Christmas gifts
I have a craft show on 12/7 I’m trying to make some stuff for
I need to get stuff cleaned out of my house so I can get my floors fixed
I need to be cleaning closets/etc to make more room
I’m trying to plan a big event next summer
OH YEAH – and I have a blog post due in 4 days.

For those of you who don’t know me, or don’t know me well, I usually do fine under pressure. I usually do really well with handling stress and getting everything done I need to do, even if I myself am not quite sure how I make it all happen sometimes. USUALLY. Not last night. I should mention that I’m also having just a bit of “scrapper’s block” at the moment, so I just don’t feel inspired or like anything I make looks halfway decent. So I forced myself through making one page, had a glass of wine, cried and went to bed listening to Scarlett O’Hara in my head (yep, she lives there). I slept in, woke up this morning and knew EXACTLY what to do for my blog post. I’m going to make a video about some of my favorite things I have bought recently in an attempt to “UP” my card-making game – which is WEAK. SO I:

Make coffee
Get out the products I want to talk about and put them on my desk
Let the dog out
Made breakfast (Pumpkin spice French toast with sliced bananas and cinnamon sugar)
Actually get dressed so I can even do an on camera greeting
Put my hair up so you don’t notice my excessive Sunday morning “bed head”
Light all my amazing fall candles and turn on my scent warmer so I get ALL the amazing pumpkin smells
(By now I am feeling pretty good about myself)
Set up my tripod and accidentally knock down one of the dried funeral roses from my peg board. (Uh oh)
Dig out the box of cards I keep on hand to talk about it
Double check that I have out all the supplies I want to talk about
Go to grab the camera to start filming…

AND THAT’S WHERE IT ALL FALLS APART!!!

No camera. No clue where it is. So now you get a story. But I’ll still show you the products I wanted you to see. And I put RumChata in the coffee, took down the pony tail and put on one of my favorite sweatshirts that is like 4 sizes too big.


Favorite “crafting tool” #1 – sloth slippers – because crafting is really hard if your feet hurt, or are cold


#2 – Card Box – I like to always keep a “stash” of ready-made cards on hand. (This isn’t a new purchase, but something important to my card giving game)


#3 – Stamping platform – like the one by Tim Holtz, but I know those are gone now.  The MISTI is also AMAZING for those that don't have a platform yet, and they come in THREE sizes.   I am a TERRIBLE STAMPER and this way, I can restamp any areas I miss – or make easy duplicates.


Memory MISTI 12 x 12 - Most Incredible Stamp Tool Invented


#4 – As for the newer stuff – I am LOVING the Catherine Pooler Midnight ink pad for stamping!  These pads are so juicy and they stamp so well, and the ink stays a nice beautiful black.


And lastly - #5 – Taylored Expressions Simple Strips dies and Stamps.

Ladies, these have TRULY changed my cardmaking! I have the basic set and the friendship set.  You just stamp these out, line up the little boxes with the squares on the die – run them through your die cut machine and BAM!  The perfect sentiments.  I just stamp and cut a few sets of these and keep them in the front of my card box.  Instead of making “themed” cards, I just make them really simple and then I can add a sentiment as I need the card.  So instead of having 20 wedding cards and needing one for a birthday – I just have more basic cards that can be for anything I want.


So – what am I missing, what are your favorite finds lately that have upped your crafting game?  I’d love to hear them!  Comment below and share with a friend.

Til next time
-Shawn

Wednesday, November 13, 2019

Meet The 2020 Doodlebug Design Team!!


Amberly Hoffman

Hello, my name is Amberly and I am a returning design team member. I have been a paper crafter for many years, and it really provides stress relief and an escape for me. I enjoy being on the design team as it allows for opportunities to be challenged and provide for regular projects to work on. Not to mention Hannah and team are great to work together!
I am a Registered Nurse to pay the bills. In my spare time I spend with my family and my two pups Gabby and Dexter (they tend to make appearances in my projects). One of my favorite style of crafting is mixed media, where any mistake can be painted. I enjoy creating projects with whimsical stamps and all things Prima.

---Amberly


Shawn Hillenbrand


Hi!  I am so excited to be joining the Doodlebug Design Team!  My name is Shawn Hillenbrand.  I live in Evansville and have two interesting kids and one very spoiled dog who keep me on my toes.  I recently lost my husband of 27 years after a prolonged battle with cancer.  I have been scrapbooking for the better part of 20 years and still mainly make pages, but I do make a card or other project every now and then. 
I don’t necessarily have any one specific style and have been known to do a little bit of everything.  Nothing much scares me to try at least once.  I do personally find myself drawn to bright bold colors.  I don’t scrapbook chronologically; I usually just do whatever strikes my fancy at the time.  I have been able to continue to feel inspired to keep scrapping by attending local crops and participating in an online community with a few hundred of my closest scrappy friends. This hobby is my creative outlet, but is also a big part of who I am and I cannot imagine my life without it.

--Shawn


Janice Horney


Hi.  My name is Janice Horney and it is a pleasure to be part of the Doodlebug Design team.  I had the opportunity to work with Hannah for a few years at the store and I learned a  bunch of new crafting techniques and met a ton of wonderful people.  I like to be crafty and it all depends on what the mood is.  I do scrapbooks, cards, flowers, home decor, candy treat favors and wood crafts.  I fell in love with the wood crafts after I took a class at The Doodlebug. I still have that cute scarecrow hanging on my wall for the fall holidays. Who knew you could take wood, card stock, paint and glue, and turn it into a unique home decor piece.  
I live in Loogootee with my husband, Jeff and we have two sons.  Jesse is in Terre Haute studying Robotics at VU and Justin is at IU Southeast studying Accounting.  Both will be finishing up their studies soon, so that is a big plus!!!  I look forward to posting some samples soon and mostly look forward to what others post as well, so we can inspire each other to be creative!
---Janice


Debbie Toy


Hello Fellow Doodlebug Fans!  I am SO excited to share my passion and crafty creations with all of you while on the Doodlebug Design Team AND offer a few classes too!  As for me, after college I was a manager for Michael's for 2 years and a manager for Hobby Lobby for 12 years.  After leaving Hobby Lobby due to a back injury, I have been working in a office processing payroll, bookkeeping and doing income tax prep.  When I am not working, all of my vacation time is spent attending craft and stamping shows and playing in my own craft area.  I have been stamping and scrapbooking for over 20 years.  

---Debbie


Tuesday, November 5, 2019

Ink Blending Using Stencils

Hello Paper Crafters… I've always be intrigued by the beauty of stencils, however, when I tried to use them, the results were not what I wanted.  Then, a couple of wonderful tools were introduced, and I was amazed as to how easy it became to use stencils.  What a difference they made!  These fab tools are the Wendy Vecchi MAKE ART Stay-tion-All-In-One Magnetic Surface and the Picket Fence Studios Life Changing Blender Brushes.

TheMAKE ART Stay-tion is a 12 x 12 inch steel magnetic base with printed grid, four brushed aluminum magnets, and one flexible, magnetic centering ruler.  By placing the magnets on the stencil that is on top your paper everything will be held in place and your stencil will not move.


The Picket Fence StudiosBlender Brushes are ergonomically designed ink blending brushes created for easy application of all water-based ink.  There are assorted sizes to cover fine to broad applications.  They are available in a package of 2, 4, 6, or 10 brushes.  Clean them with gentle soap and water, air dry.

The steps for creating a stencil card follow:


- Place the paper you would like to use for your stencil image on the Wendy Vecchi MAKE ART Stay-tion-All-In One Magnetic Surface.


- Place the stencil on top the paper and use the large magnets to hold the stencil in place.


- Select the water-based ink(s) you would like to use on the stencil.  I used Catherine Pooler and Tim Holtz Distress Oxide ink pads.


- Using the Picket Fence Studios Life Changing Blender Brushes, pick up the ink color and rub off the brush on a craft mat and then, begin going over the stencil in a circular motion. For more color, continue adding ink to the brush and coloring over the areas you would like to have more color. Also, don't be afraid to mix colors together forming new, beautifully blended colors.


- When you have completed inking through the stencil, remove the magnets and pick up the stencil.  Be prepared to be amazed.


- Clean your stencil with a baby wipe and remove the ink from your brush by rubbing off on your craft mat or towel.

-That's it!  So easy. 

I want to share with you some of the cards I created with these tools and stencils...

For the first two cards, I wondered how the ink would look if used on different colors of paper.  The card on the left was created with a cream-colored sheet of cardstock.  The card on the right was created with the Lawn Fawn Narwhal (grey colored) cardstock.  The stencil is "Lovely Lace" from Gina K Designs.  I used the Catherine Pooler "Royal Treatment" ink on both.  However, on the Narwhal cardstock, I used "Sugared Lavender" in the center for a lighter color.  The result...


The cream-colored card was completed with...

  • Foundation Decor - Foundation Paper Plaid/Dots "Purple"
  • Jillibean Soup - Flower Bloom "Sorry - you are in my thoughts" stamp, which we received as a gift at one of The Doodlebug Retreats at Santa's Lodge.  Did I mention before how wonderful the goody bags are at The Doodlebug Retreats!!!

The grey colored card was completed with...


The Picket Fence Studios "Heart ofFlowers" stencil and Catherine Pooler "Daydream" ink were used on the next card.


This card was completed with...

  • Simple Stories Heart - 2 x 2 Elements paper
  • Simple Stories Heart - Remember paper

Outside and inside of the card...


The Gina K Designs "Floral" art stencil and the Catherine Pooler "Eucalyptus,"" Green Tea," and"Rose Petals"
 inks were used on the next card.


This card was completed with...

  • Kaisercraft Scrap Studios - Splatter paper (used elements from the front and back of this sheet)
  • Kaisercraft Morning Dew - Tranquil paper (for the inside mat)
Outside and inside of the card...


The CE Stencil- Crackled Brick Stencil and the Catherine Pooler "Eucalyptus" ink were used on the next card.


This card was completed with...

  • Foundation Decor  - Foundation Paper Plaid/Dots - Green
  • Copic markers
  • Large flower from the Gina K - Theresa Momber Daisy Delight stamp set

Outside and inside of the card...


For the final card, I used the Picket Fence Studios "Floral" stencil and the Tim Holtz by Ranger Distress Oxide inks including "MustardSeed," "Ripe Persimmon," and "Aged Mahogany."  It was so fun to see what happened as they blended together.


This card was completed with...

  • Adornit Vintage Groove Collection - Fall in Love Paper
  • Gina K Designs "All About You" stamp set
  • Gina K Designs Double Stitched Circles Dies - Small and Large


Since this is my last blog as a Doodlebug Design Team member, I wanted to express my heartfelt thanks and appreciation to  Hannah Thyen for having the best scrapbook store around and giving everyone the opportunity to try out for the Doodlebug Design Team.  It's been an awesome experience.  I've broadened my paper crafting horizons and loved working with all the new product.  Also, a big thank you to Leigh Ann Frick for being the Design Team coordinator.  To my fellow Design Team Members...it was an honor crafting with you and seeing your beautiful projects.  Most importantly, thank you to The Doodlebug customers that read our blogs and offer words of encouragement and happy comments.  I can't thank you enough.  A special thank you to my beautiful friends Leah and Haley for many of the awesome pictures I used with my projects, and, to my travel buddies that shared this journey with me.  You made it so much fun.  I wish the next Doodlebug Design Team days of happy crafting.  You are a talented group, and I can't wait to see what you create!  Although I didn't try out for the next team, I will continue to share some of my projects with you, and I look forward to seeing many of you at The Doodlebug classes and retreats!      


Visit The Doodlebug, Inc., in Jasper, IN, to see more of the beautiful stencils and other products shown in this blog; or, shop online at The Doodlebug! 

Thanks for checking out my stencil projects.  Happy crafting with The Doodlebug!

Melody